You never know when you might stumble on something that requires a rapid response to capture the shot.
Rather than unlocking the phone and entering your password before selecting the camera app, you can quickly swipe the screen left and the camera opens up ready to go.

2. Use a Selfie Stick to Broaden Your Perspective
To some degree, the smartphone gets a lot of credit for the Selfie craze we see today. No longer do we need to ask a stranger to take our picture in front of an amazing background.
What’s great about a selfie stick is that you are no longer limited to the length of your arm. I
n these photos, you can see where the view was limited at arm’s length while the other photo uses a selfie stick for a broader perspective.
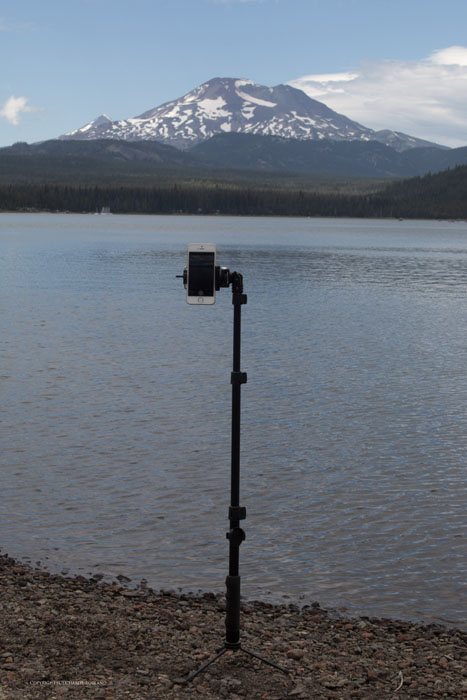
These can be very handy not only for selfies. If the stick has legs, you can use it like a tripod. This is especially helpful in low light conditions where camera movement might cause blur.
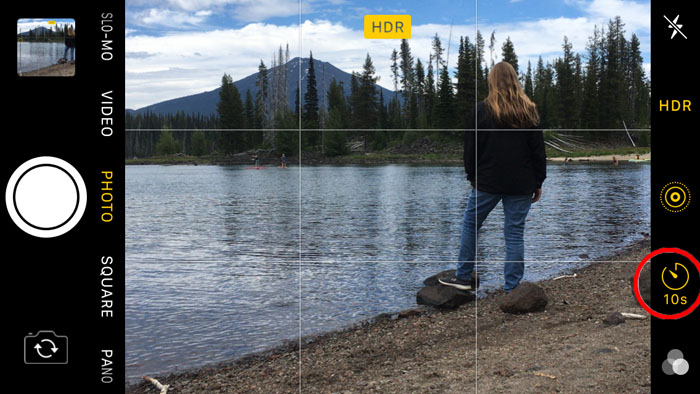
3. Try the Self Timer
The self-timer feature is a step up when wanting to capture a different style of selfies or any scene for that matter. The timer can be set for 3 or 10 seconds. Which time you choose depends on how much time is needed before capture.
3 seconds is not a lot of time but can be useful when you want to take a picture without touching the camera. The 10-second feature is better if you want enough time to press the shutter and then get in front of the camera.
4. How to Set the Focus
Most of the time, the focus will be sharp throughout an average scene due to the iPhone’s tiny sensor. When you want something specific to be sharp such as a close-up, using the set focus feature will ensure that your main subject is sharp.

This photo is a close-up of the flowers. As you can see, the focus is not on the flowers and is more average for the scene.
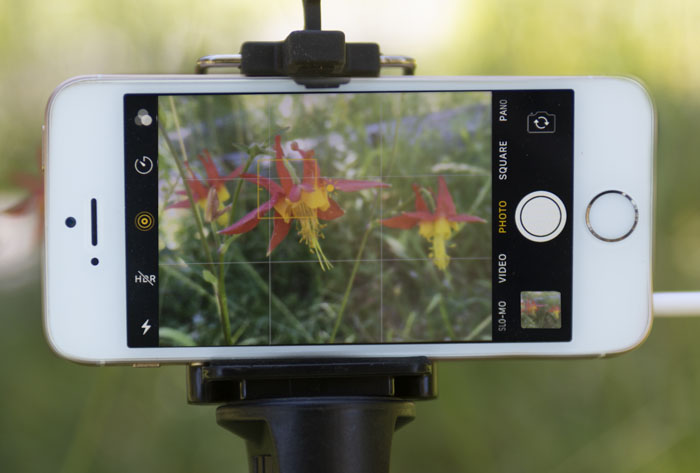
The solution is simple. Just touch the screen and place the yellow square in the area you want to be in focus.

By placing the subject closer to the camera and making it in focus, the depth of field appears shallow. This throws the background more out of focus for a nice effect.
5. Shooting Modes
Depending on the iPhone model, there are several modes you can choose from, including Time-Lapse and Slo-Mo for videos, Video, Photo (4×3 Ratio), Square (2×2), Pano (for panoramas). The latest models also have a Portrait Mode.

While capturing still photos, the 4×3 Photo mode is a perfect ratio for many scenes. For example, this cracked mud in the desert where the foreground is close to the camera and the top of the photo is further, giving the impression of depth.
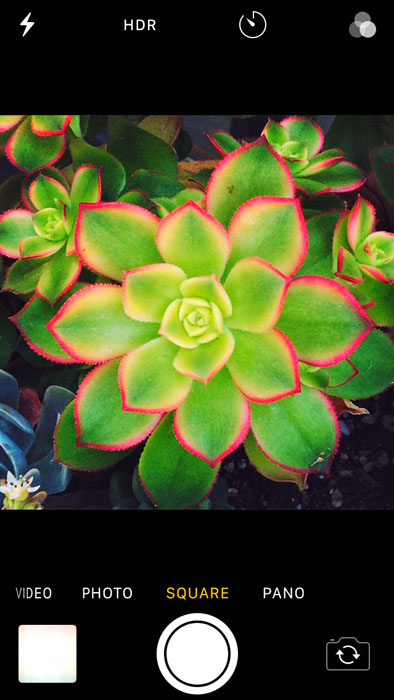
Square mode is also very useful when you have a subject that fills the square format nicely.

The Panorama feature can be a lot of fun and is very easy to use. Select the Pano mode, touch the shutter button, and then move the camera from left to right.
It works best if you have a tripod to keep the camera level. If you don’t have one, try your best to keep the camera level while panning left to right.
You might notice the photo above has a black strip in the lower left and upper right. This is the result of the camera not maintaining a level position while moving left to right.
The camera was higher on the left and lower as it approached the right side. You can easily crop this out, however.
6. Cropping Images
Sometimes you might capture an image and later discover something in your photo you want to crop out. That was the case with this old rusty piece of mining equipment.
I did not care for the vertical pole on the left side of the background and decided to crop it out. This left the subject more centered in the frame.

To use the Crop feature, choose the photo from the camera roll and open it, then select Edit. At the bottom next to Cancel, is the crop tool.
Click that and then you can drag the sides or corners anywhere you wish on the photo. And if your horizon is tilted, you use two fingers to rotate and straighten or drag on the dial right below the picture.
7. Adjusting Exposure
The iPhone’s metering is for the most part automatic when measuring light bouncing off the scene.
While average scenes with average lighting may expose correctly, there may be times where it does not. Fortunately, adjusting exposure is quite easy.
This full tonal range image is easy to meter and accurately exposed.
You may also like:
How to transfer messages from iPhone to iPhone
Jihosoft iPhone Backup Extractor Extract and recover all types of data from iPhone backup files, such as camera roll photos, videos, SMS, contacts, reminders, WhatsApp, and etc.
Any app suggestions or topic recommendations are appreciated in the comments down below.


0 Comments